You’re a Peach!

Happy long weekend to my Canadian friends and family! It’s been a loooooong time since I posted two blog posts in the same week, let alone a couple days from each other. I feel like I’m on a bit of a roll! šŸ˜‰

I actually have another recipe that I’m sure you’ll enjoy – Peach Pie!! ā¤Ā TurnsĀ out it’s now Matt’s new favourite. ItĀ actually pushed his beloved strawberry rhubarb pie aside to second place,Ā and that says a lot!Ā To be honest when I told him I hoped to bake a peach pie with all of the peaches we bought, he eagerly washed, peeled and sliced each one to give me a head start on making it! This pie is SO yummy! I even made the crust (yay me!), which always seems like such a process (ugh!). I was more partial to Tenderflake crust, but after asking around I discovered that a homemade pie shell isn’t actually all that hard. And all this recipe called for is 4 ingredients! You can handle 4 ingredients, right? šŸ˜‰ I’ll walk you through it. šŸ™‚

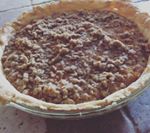
Streusel Topped Peach Pie

  • Difficulty: medium
  • Print
Peach pie

Ingredients

    Filling:
  • 1/4 c. sugar
  • 1 Tbsp. cornstarch
  • 1 1/2 lbs. (approx. 4 cups of Peaches – halved, pitted, cut into 1/2″ slices & cut in 1/2 crosswise
  • 1 Tbsp. lemon juice
  • Pie Shell:
  • 1 c. flour
  • 1/2 tsp. salt
  • 6 Tbsp. butter, cold
  • 4 Tbsp. water, ice cold
  • Streusel Topping:
  • 3/4 c. flour (all-purpose)
  • 1/2 c. brown sugar
  • 1/2 tsp. ground cinnamon
  • 1/3 c. butter, cold

Directions

Filling:
1. Make filling by whisking sugar & cornstarch in a large bowl.
2. Add peaches & lemon juice; toss to combine. Set aside.

Crust:
1. Mix together flour and salt in medium sized bowl.
2. Cut in butter with pastry blender (or forks) until mixture is pebble sized crumbs.
3. Add water and blend until mixture pulls together.
4. Roll into ball and place on lightly floured surface.
5. Roll out dough to about 13ā€³ circle.
6. Gently roll dough around rolling pin and unroll over pie pan.
7. Gently press into pan and turn edge under (I didn’t have time to makeĀ it pretty, but you can if you wish!)
8. Spoon peach filling into your pie crust.

Streusel Topping:
1. In medium bowl, mix 3/4 cup flour, the brown sugar and cinnamon.
2. Cut in butter, using pastry blender (or fork or pulling 2 table knives through mixture in opposite directions), until mixture looks like coarse crumbs.
3. Sprinkle streusel topping evenly over pie filling.
4. Place pie onto a baking sheet (to prevent bubbling mess in oven), and bake at 375f for 35-45 minutes.
5. Pie will be done when filling is bubbling and crust is golden brown.
IMG_2640

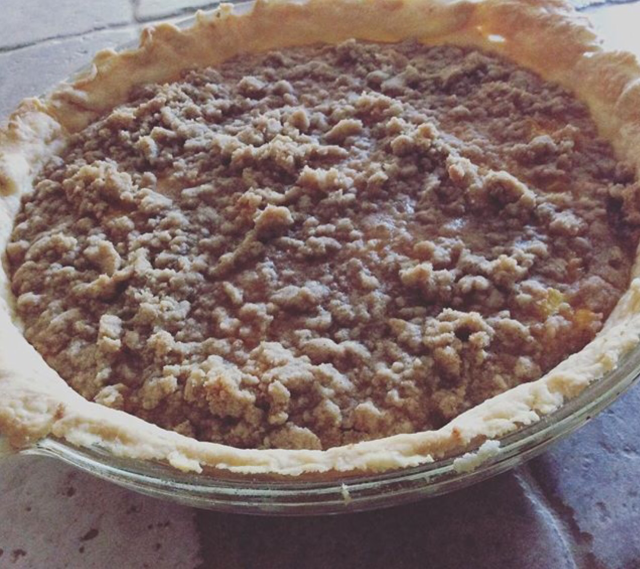
Mmm – this pie is so good! Juicy peaches in a flaky crust…It’s the perfect thing to bring along to your next potluck or BBQ. Enjoy!

Try my keylime pie recipe!

Signature

Do You Know the Muffin Man?Ā 

Hello friends! Today I hope to change your life. Your breakfast life, that is! I mean, just look at these delicious blueberry almond coffee cake muffins šŸ˜€ .

Now, I love coffee cake. And coffee cake filled with fresh fruit is even better. Give me coffee cake in muffin form and JACKPOT! These muffins are perfect for brunch, with coffee, without, or as an on-the-go snack. Make a batch of these warm, comforting muffins for the weekend, for a gift to share and whoever is lucky enough to taste these, well, they’ll justĀ be begging you for more! šŸ˜‰

I like to bake on the weekend and enjoy the leftovers during the week. This recipe should only take you about 25 minutes to make, so I encourage you to try it. I think you’ll be pleasantly surprised how easy and delicious these are. These are the perfect thing to make after a picking up some blueberries from your local farmer’s market!


Blueberry Muffins recipe

Signature


Key Lime

Happy first day of Summer friends and followers! June 20th and what a beautiful first day of Summer it was. The sun was shining and I was just craaaaving a key lime treat! Seems to me that tangy sweet lime accompanies warm, Summer days well and so I decided to whip upĀ somethin’ to embrace the change of seasons šŸ˜€ .

I love citrus flavours, but I’m admittedly not much of a pie person (cue the gasp!). But hubby loves ’em and I can dig a slice once in awhile. Now,Ā I have never attempted to bake a lime pie before. But why not try? The recipe I found was super easy and I was able to successfully bake it while Levi was nappingĀ – which is definitely a plus. It took about 30 minutes, and it is SO addicting. You won’t be able to stop at just one slice ā¤ .

Key Lime Pie

Confession time: So I did NOT use actual key limes. They are just waaay too small to be bothered with and too hard to find (gave up searching after 2 stores :P! ) So I used plain, ol’ limes and it really made no difference on the taste factor in my opinion.

Key Lime Recipe

So, if the mood strikes ya, try out this recipe! The crust is simple for being homemade, and I love the whipped topping. I’m sure if you were in a REAL hurry, you could just use a store bought pie crust and a can of whipping cream. The pie would still be delightful, no doubt! šŸ™‚

Enjoy the rest of your week!


Signature

Buffalo Chicken Pasta Bake

Umm, there’s really no words to describe how GOOD this recipe is…I guess that’s if you like Buffalo Chicken! šŸ™‚ Which, both Matt and I do, so this recipe is a keeper!!!

I was REALLY craving Buffalo Chicken, and was looking for a recipe that would satisfy. I stuck to a recipe fairly closely, adding just a few ingredients of my own to make it my own. Feel free to use more or less of everything to personalize it and have it suit your tastes!


Buffalo Chicken Pasta Bake

Adapted from Homemade Delish

Ingredients:

1 16oz. box of Penne pasta, cooked and drained

2 Boneless, skinless chicken breasts, cubed

1 c. Button mushrooms, sliced

1/2 c. White onion, diced

1 c. Hot sauce (Frank’s)

3/4 c.- 1 c. Blue cheese dressing (ranch would be yummy, too!)

1/2 c. Shredded cheddar cheese

Buffalo Chicken Bake

Directions:

  1. Preheat oven to 350’f. and get out baking dish (I used a 9×13″ glass Pyrex).
  2. In a frying pan, add a little oil (whatever you use, I used 1 tsp. olive oil) and place chopped chicken inside. Season with whatever you choose! I used just a little sea salt and pepper and start frying.
  3. Add onions and mushrooms and sautƩ along with chicken.
  4. Add hot sauce to mixture while continuing to cook chicken until it’s done the way you like.
  5. Put cooked pasta in the baking dish, and then add the chicken mixture and stir together.
  6. Pour blue cheese on top and maybe a few more squirts of hot sauce – for good measure! šŸ˜‰
  7. Sprinkle cheese on top and pop into the oven and bake for 20-25 mins.

It’s soo good! šŸ˜€ We enjoyed ours with a simple side salad. I kind of forgot to take a picture of the end result because we gobbled it up so quickly… šŸ˜‰ I hope you’ll try it sometime!!

Have a fantastic weekend everyone!

Lemons & Homemade Lemonade

Mmm…there’s nothing quite like a cool, refreshing glass of that sweet and tangy lemonade on a warm Summer day. If it’s homemade, I think it’s even BETTER. I love lemonade. Pink lemonade. Yellow lemonade. From the can (frozen) or from the carton, I’ll drink it any way it’s served. But for a real treat, I thought I’d try my hand at homemade lemonade and – wow! It was amazing.

When it comes to a refreshing Summer-time drink, you can’t beat that glass of old-fashioned, fresh-squeezed lemonade <3. It’s tart, delicious and super easy to make! Just 3 easy steps and 3 ingredients. Look below for details šŸ™‚ .

Lemonade

Ā Homemade Lemonade:

Ingredients:

  • 1 c. sugar
  • 1 c. water
  • 5 lemons
  • 5 more cups of water

3 Easy Steps:

1. Simple syrup

2. Squeeze all the lemons

3. Mix it all together

Let’s start with the simple syrup:

This part always used to intimidate me a little. Just because I didn’t know what went into a “simple syrup”. But trust me, it couldn’t be more simple! It takes like, 2 minutes…

Directions:

1. Combine 1 c. sugar with 1 c. water in a small pot and stir over medium heat until sugar has completely dissolved.

That’s it! šŸ˜€

2. Remove pot from element and let cool.

3. Begin squeezing lemons (If you don’t have a handy dandyĀ lemon juicer – don’t fret! Read below)

Another method on how to juice a lemon:

1. Spear a lemon half with a fork.

2. Hold the lemon half in one hand and the fork in the other.

3. Squeeze the lemon in one hand while pumping the fork up and down with the other hand, as if it were the handle of a water pump.

4. Continue to squeeze until you’ve extracted all the lemon juice that you can!

Continue making lemonade:

1. Pour the lemon juice through a strainer, and mash the pulp around to get every last drop of that lemony goodness šŸ™‚ .

2. Pour your lemon juice into a pitcher and add those 5 cups of water.

3. Add as much or as little of that simple syrup as you like.

4. Pop it in the fridge to chill, or serve immediately over ice!

The nice thing about making your own is that you can sweeten it as much as you like. We have an infuser pitcher which has a column in the middle that allows you to add fruit. I can make infused water, or fruit juice fruitier, which is nice. So I fill it with lemon slices to make lemonade that much tangier šŸ˜‰ .You can always float extra lemon wedges/slices in whatever pitcher you have to give it that extra zing!

Iced tea pitcher

I was shocked and delighted at how easy it was to make your own. And what to do with those lemon rinds? Well, you could always wash them out, fill them with water and put them in muffin tins. Stick them in the freezer overnight and you have icy lemon cups to toss into a fruit punch or jug of ice water. Or not, but the option is there šŸ˜‰ .

Oh, and this week I’m 14 weeks!! Which according to Google searches means Baby K is the size of a lemon. Whad’ya know! šŸ˜€ Happy Thursday friends.

14 weeks

Jumbo Raspberry Chip Muffins

Let me just say this: there’s raspberries AND chocolate in these muffins, so I pretty much guarantee you’re going to love them!

I made these muffins for Matt to take with him to work (or that’s what he THINKS at least šŸ˜‰ ) but I was feeling pretty good (getting my energy back!) and really wanted to bake. Plus I’ve been digging fruit so I decided to roll with it. So he took a few…and I got to keep some to enjoy as well, of course!

Ingredients:

– 3 c. all-purpose flour (careful not to over measure)

– 4 tsp. baking powder

– 1/2 tsp. salt

– 1 tsp. cinnamon

– 2 lg. eggs (at room temp)

– 1/2 c. granulated sugar

– 1/4 c. brown sugar (I used light)

– 1 c. milk (at room temp)

– 1/2 c. coconut oil, melted (you CAN use canola/vegetable oil)

– 1 tsp. vanilla extract

– 2/3 c. white chocolate chips (dark or semi sweet would be delightful, too!)

– 1 & 1/4 c. fresh raspberries*

Raspberry & Chocolate Chips

Directions:

Preheat oven to 425′. Brush muffin tray with oil/spray with non-stick spray. Set aside.

In a large bowl, gently whisk together flour, baking powder, salt and cinnamon. Mix until all combined. Set aside.

In a medium bowl, whisk together eggs and both sugars until combined. Mix in milk, oil, and vanilla extract. Mixture will be a bit of a pale yellow. Fold wet ingredients into dry ingredients and mix everything together by hand. Avoid over mixing which would result in tough, dry muffins.* Gently mix until all the flour is off the bottom of the bowl and no big pockets of flour remain. The batter will be extremely thick and lumpy. Fold in the chocolate chips, then very gently (to avoid them from leaking their colour), fold in the raspberries.

Spoon batter into prepared muffin tin, filling all the way to the top.* Sprinkle tops with extra sugar. Bake at 425′ for 5 minutes.* Keeping the muffins in the oven, reduce temperature to 375 and continue to bake for 14 minutes until tops are lightly golden. Insert a toothpick into the centre and it should come out clean. Allow to cool for 10 minutes. Muffins taste better the same day, but they will last for up to 5 days if stored at room temperature in an airtight container.

*Be sure to read below for details and rationale for baking temps, etc…*

6-e1428683087408

These muffins are so good!!! Super – moist and they come out extra tall if you fill the batter to the brim in your muffin tins. Baking them at a higher temp for the first 5 minutes (before lowering the oven temperature) lifts the muffin top up quickly and creates a tall crust.

They taste like your favourite bakery style muffins – you really should try them. Muffins from scratch are super easy, especially if you have a recipe to follow ;). These would be great with dark chocolate chips or semi as well. I actually wanted to use semi-sweet, however I didn’t have enough chipits left in the bag! Then I saw that I had a full bag of white chocolate chips and I actually did a bit of both (even though the recipe states “white chocolate”)! Be sure to use fresh raspberries as the frozen ones have too much juice – leakage.
Tart, sweet, and decadent all in one bite šŸ˜€ . Put away the cereal, don’t toast that bagel and you’ll thank me later! šŸ˜‰

image

KFC Knockoff Coleslaw Recipe

Sorry it’s been awhile! Life has been busy, but at the same time, not exactly “blog-worthy”. However I wanted to share this recipe that I just made tonight!

I’ve been feeling so good lately, I really have no complaints, but been having random food aversions and cravings. I’m suddenly such a picky eater! I REALLY was in the mood for a refreshing side dish to go with some of the BBQ we’ve been having. The weather here has been quite hot and humid the last couple of days (almost feels as if we just skipped right past Spring!) so we’ve been enjoying chicken and burgers on the grill.

This coleslaw is a copycat Kentucky Fried Chicken recipe, and I have to say that it tasted pretty darn similar! I made a big serving, so we could refrigerate it and have it with a couple meals. I used my food processor on the cabbage, carrots and onion, and while it makes things faster it’s not necessary. I don’t think KFC has onion in their slaw, nor do they use red cabbage but I did. And some say adding Tarragon Vinegar instead of white vinegar would give it a more true KFC flavour, however I did not have any on hand, and this mama-to-be wanted coleslaw and she wanted it NOW!! šŸ˜€

Red Cabbage
  

KFC COPYCAT COLESLAW

Dressing Ingredients:

1/2 c. mayo

1/4 c. granulated sugar

1/4 c. buttermilk

2 1/2 Tbsp. lemon juice

1 1/2 Tbsp. white vinegar

1/2 tsp. salt

1/8 tsp. pepper

Salad Ingredients:

4 c. red cabbage, finely chopped (approx. 1/2 head)

1 lg. carrot, shredded

2 Tbsp. onion, minced

Instructions:

1. Combine dressing ingredients in a large bowl, and beat until smooth.

2. Add salad ingredients to the dressing and mix well.

3. Refrigerate for at least 2 hours before serving.

I hope you enjoy this side dish! It’s great for BBQ’s, potlucks and parties and you’re bound to get people raving about it! If you make this, be sure to let me know how it turns out! Keep me in the loop with any additions/alterations you may make! I’m always willing (maybe not so much lately, with this picky baby šŸ˜‰ ) to try new things and tweak my recipe.

**You might want to check out some of these salad recipes too**

Until next time,

Scrumptious Salads

I don’t know what it is about the Spring, but as soon as it starts getting warmer out, and the days stay light a little longer, I start to crave salads. Winter is over, Spring is finally here, and I make comfort food no more! Gone are the Shepherd’s Pies, meatloaves, chillies, Mac and Cheese dishes and soups from my ‘menu’. I start to say, “Hello” to the crunchy, refreshing, colourful salads of Spring and Summer! A perfect side dish to so many entrees; they’re so versatile! Some of them are hearty enough to BE the main event at a meal!

My my love for salads runs deep, but it can be easy to get bored with them and to get into a bit of a salad rut šŸ˜„ . Here are a few of my favourite recipes I’ve collaborated that I have either already tried, or they are on my ‘must-make’ list. Hopefully these can inspire you too!


A Sweet Visitor and An Even Sweeter Coffee Cake

My sister came up to visit us a couple weekends ago. It’s such a blessing to be staying in a place where we have room for guests to stay when they come to visit! My sister and I are super close, more so now than when we were younger. There are eight years in between us, and when you’re graduatingĀ elementary school, while your sister is starting elementary school, it’s hard to relate to one another. But as we’ve grown into adulthood, we developed a strong bond and she is my very best friend. We have more in common now, too, which makes spending time together even more enjoyable.

Britt & I image1

She spent the weekend here, and it was nice just to talk and visit.Ā I haven’t seen her since the holidays, so it was nice to catch up. We went to the mall, watched a few movies, and went out for lunch a couple of times. Some much needed quality “girl time”. And of course, we HAD to find some time to bake in there. I think she likes to bake just as much as I do (or is she just being the agreeable younger sibling to her first born sister? šŸ˜‰ ).

We decided to bake a coffee cake. Something sweet that would accompany our addiction favourite morning drink…you guessed it – COFFEE! We’re pretty big fans of any caffeinated bevy. A cinnamon streusel coffee cake. Streusel means “something strewn” in old German – easy to throw together! It’s topped with a sweet glaze, which is perfect for it. And has a delicious inner circle of cinnamon. Everyone needs a solid coffee cake recipe in their repertoire, so here ya go!


Cinnamon Streusel Coffee Cake:

Ingredients:

Streusel Topping and Center:

1 3/4 cups all-purpose flour

1 cup light brown sugar, packed

1 1/4 tsp. ground cinnamon

course salt

1 1/2 sticks cold unsalted butter, cut into small pieces

1 1/2 cups pecans, coarsely chopped

For the Cake:

1 stick unsalted butter, room temperature

2 cups all-purpose flour

1 1/4 tsp. baking powder

1/2 tsp. baking soda

course salt

1 cup granulated sugar

2 lg. eggs

1 1/2 tsp. vanilla extract

1 cup sour cream (I used plain greek yogurt)

For the Glaze:

1 cup confectioners’ sugar

2 tbsp. milk

Directions:

Make the streusel topping: Mix together flour, 3/4 cup brown sugar, 1 teaspoon cinnamon, and 1 teaspoon salt. Cut in butter using a pastry cutter or rub in with your fingers until small to medium clumps form. Mix in 1/2 cup pecans. I put some plastic wrap on the top, and popped it in the fridge until I was ready to use it.

For the streusel center: Mix together remaining 1/4 cup brown sugar, 1/4 teaspoon cinnamon, and 1 cup pecans.

Preheat oven to 350 degrees. Make the cake: Butter a 9-inch tube pan. Sift flour, baking powder, baking soda, and 1/2 teaspoon salt into a bowl.

Beat butter and granulated sugar with a mixer on medium speed until pale and fluffy, about 2 minutes. Beat in eggs, 1 at a time, then vanilla. Beat in flour mixture in 3 additions, alternating with sour cream (or greek yogurt!), beginning and ending with flour. Continue to beat until well combined.

Spoon half the batter into pan. Sprinkle streusel center mixture evenly over batter. Top with remaining batter, and spread evenly using an spatula. Sprinkle streusel topping mixture evenly over batter.

Bake until cake is golden brown and a toothpick inserted into the center comes out clean, about 50 mins – 1 hr. Once a bit cool, remove from pan and transfer to a wire rack. Let cool completely.

Make the glaze: Once completely cooled, you can glaze it up! Mix together confectioners’ sugar and milk. Drizzle over cake, and let drip down sides. Let set for 5 minutes before serving.

** Best enjoyed with a hot cuppa java šŸ˜‰ **

Cinnamon Streusel Coffee Cake

Recipe adapted from Southern Food

{Check out my cinnamon scone recipe here!}

Carrot Cake Cookies

I usually bake at least one item/treat/baked goodĀ for Matt to be able to pack in his lunch. I rather like this domesticated diva business over these past several months šŸ˜‰ . I usually see carrot cake cookie recipes iced with a cream cheese frosting. Well, that would be delicious, butĀ I didn’t happen to have any cream cheese on hand. Did that stop me from making these?! Nooooo way!Ā Mine were iced withĀ a fresh,Ā citrusy orange glazeĀ insteadĀ – it was the perfect match for them! This a great, Spring-y recipe that results in soft, chewy cookies. Mmm! šŸ˜€ The perfect recipe if you’re looking to make cookies for Easter.

Carrot Cake Cookies


Carrot Cake Cookies:

Makes about 30 cookies

Ingredients:

Cookies:

1/2 cup butter, softened

1/2 cup brown sugar

1/2 tsp. vanilla

1 egg

1 1/2 cups flour (I used all-purpose)

3/4 tsp. cinnamon

1/4 tsp. nutmeg

1/2 tsp. b. soda

1/2 tsp. salt

1 cup carrots, coarsely grated

1/2 cup raisins (optional)

1/2 cup walnuts (optional)

Orange Glaze:

1 cup confectioners (icing) sugar

1 tbsp. butter, melted

1 tbsp. juice of an orange

1/2 tsp. orange zest

Orange Frosting

Directions:

Preheat oven to 350*. In a large bowl, cream butter, brown sugar, and vanilla. Add egg and mix well. Add flour, cinnamon, nutmeg, baking soda and salt and mix until completely combined. Fold in carrots (and raisins and walnuts, if using them). Place spoonfuls of dough on an ungreased baking sheets and bake for 9-12 minutes. Remove from cookie sheet and place on cooling rack. Ice cookies with orange glaze once they have cooled to room temperature.

Orange Glaze:

In a small bowl, whisk together icing sugar with butter and orange juice. Add more or less butter and icing sugarĀ (depending on how thick you want it). Spread glaze over cookies and top with orange zest.

Cookies

Enjoy!

*Recipe inspired byĀ From Cupboard to Cupboard*


Well, I hope you give these a go! They truly are delicious.

What are some of your favourite cookie recipes? Please share!

Ā